Transform your dorm room with contact paper: 8 luxury hacks under $30
Transform your small space affordably with contact paper! Discover stylish DIY projects that bring luxury and personality to your dorm. Explore now!
Contact paper has emerged as a game-changer for transforming small spaces on a budget. It’s the secret weapon every student needs for stylish, temporary upgrades.
Whether you’re looking to update worn-out furniture or add a high-end touch to your dorm, contact paper offers endless opportunities for customization. Let’s dive into eight easy DIY projects that are both affordable and luxurious!
Easy DIY Projects with Contact Paper for a Luxe Look
1. Transform a Dresser with Burl Wood Contact Paper
Give your basic dresser a touch of sophistication with burl wood contact paper. This easy hack offers a vintage, high-end look for under $30.
Materials Needed:
- Burl wood contact paper (light or dark)
- Basic dresser (such as IKEA Hemnes)
- Old credit card or smoothing tool
- Scissors or utility knife
- Ruler
Step-by-Step Guide:
- Clean the dresser surface to ensure it’s free of dust and grease.
- Measure the dresser panels and cut the contact paper slightly larger than needed.
- Apply the contact paper evenly, smoothing it with an old credit card to remove bubbles.
- Trim the excess paper with scissors or a knife for clean edges.
- Optional: Upgrade the dresser knobs to metallic finishes for a polished look.
Tip: Pair burl wood finishes with gold or bronze hardware for a truly luxurious vibe.
What Else Would You Like to Know?
Choose below:
2. Create a Marble Countertop for Study or Kitchen Spaces
Get the sleek, sophisticated look of marble countertops without overspending. Perfect for desks, kitchen counters, or even coffee tables.
Materials Needed:
- Marble-pattern contact paper
- Scissors or utility knife
- Clear acrylic spray (optional for added protection)
Steps to Follow:
- Wipe the surface clean and ensure it is dry.
- Cut the contact paper to fit the area, leaving a slight overlap for adjustment.
- Carefully apply, smoothing out air bubbles as you go. Use a credit card for this step.
- If desired, seal with a clear acrylic spray to make the surface more durable.
Pro Tip: Use dark marble patterns for bold, dramatic spaces or white marble for minimalist aesthetics.
3. Add a Pop of Personality to Cabinet Interiors
Make the inside of your cabinets just as stylish as the outside. Use patterned contact paper for a fun, personalized detail.
Materials Needed:
- Geometric or solid-color contact paper
- Scissors
- Measuring tape
Steps to Apply:
- Measure the interior of the cabinet doors or shelves.
- Cut the contact paper to size and attach it carefully, smoothing as you go.
- Ensure all edges are sealed to prevent peeling over time.
Expert Tip: Use contrasting patterns inside your cabinets to make organizing more enjoyable!
4. Refresh Old Tabletops for a Budget-Friendly Modern Look
A scratched or dated tabletop can be instantly revitalized with contact paper. Choose designs like wood grain or marble for an upscale feel.
Materials Required:
- Wood grain or marble contact paper
- Utility knife
- Ruler or straight edge
Process:
- Clean the tabletop thoroughly and let it dry.
- Cut the contact paper to fit and align it carefully across the surface.
- Smooth the paper with a credit card, working out any bubbles.
- Trim excess paper with a knife, ensuring clean edges.
Bonus Idea: Add a thin border of gold tape around the edges for a glam upgrade!
Comparison Table: Types of Contact Paper and Their Best Uses
| Type of Contact Paper | Best Applications | Price Estimate | Recommended For |
|---|---|---|---|
| Marble Pattern | Tabletops, countertops, shelves | $10-$15/roll | Minimalist or modern designs |
| Burl Wood | Dressers, cabinets, coffee tables | $8-$12/roll | Vintage or high-end looks |
| Geometric Prints | Cabinet interiors, walls, accents | $5-$10/roll | Bold or eclectic styles |
| Wood Grain | Desktops, flooring, furniture | $10-$15/roll | Rustic or traditional vibes |
Tips for Smooth Application of Contact Paper
- Always clean surfaces thoroughly with soap or isopropyl alcohol before application.
- Cut the paper larger than needed and trim excess after applying.
- Smooth out bubbles using the edge of a credit card.
- Avoid stretching the paper during application to maintain pattern alignment.
FAQ: Common Questions About Contact Paper Projects
- Q: Can contact paper be removed easily? A: Yes, use heat (like a hairdryer) to loosen the adhesive for residue-free removal.
- Q: Is contact paper durable enough for high-use areas? A: Yes, but sealing with acrylic spray can enhance longevity.
- Q: What surfaces are best for contact paper? A: Smooth, dry, and non-porous surfaces like painted wood or laminate.
- Q: Can it be reused? A: Reusability depends on careful removal and the surface condition.
With just a roll of contact paper, your dorm can turn into a personalized, luxurious space. These budget-friendly projects are easy, quick, and perfect for any student looking to make their dorm shine.
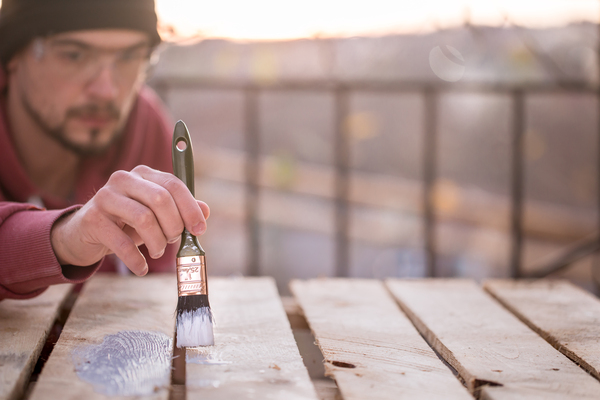
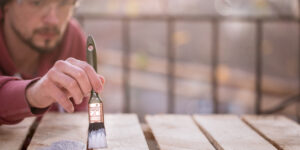
How to transform pallets into gorgeous student furniture in 3 steps
» See exclusive tips for your home