This DIY photo wall trick transforms any dorm room for under $15
Transform your space into a personalized gallery with a budget-friendly DIY photo display wall. Explore how to create a unique design that reflects your style!
Looking to add a personal touch to your dorm or apartment without breaking the bank? A photo display wall using string and clips is the ultimate solution. It’s budget-friendly, easy to assemble, and lets you showcase your favorite memories in a highly personalized way.
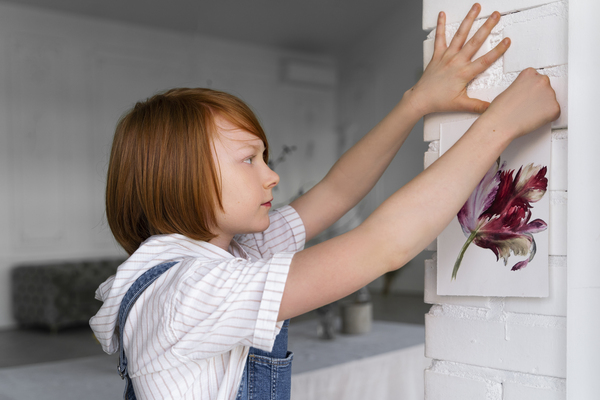
This DIY trick is perfect for small spaces—allowing you to decorate creatively while keeping things lightweight and damage-free. It’s ideal for renters and students, offering versatility and an opportunity to personalize your space with photos, notes, or artwork.
Why Create a Photo Display Wall?
Decorating a dorm or rented space can feel limiting when you can’t paint or drill holes. That’s where a DIY photo display comes in—it’s practical, temporary, and stylish. Using just simple materials like string and clips, you can transform bland walls into a gallery that’s uniquely yours.
Beyond adding personality, it’s a budget-friendly way to curate your space. Unlike expensive frames, this setup relies on everyday items, making it a student’s best friend.
Materials You’ll Need
- String (options: twine, jute, hemp, or metallic wire)
- Clips (mini clothespins, wooden pegs, or metal clips)
- Removable adhesive hooks or thumbtacks
- (Optional) Paint, markers, beads, or tassels for decoration
Step-by-Step Instructions
- Choose the type of string: Twine for a rustic look, metal wire for a modern vibe, or hemp for eco-friendly charm.
- Customize your clips. Paint clothespins with bold colors or personalize them using markers. For a minimalist approach, keep them natural or metallic.
- Decide on a layout. Horizontal rows, crisscross patterns, or zig-zags work well for small spaces.
- Attach the string using thumbtacks or removable adhesive hooks. Ensure the line is taut but not overly stretched.
- Clip your photos, polaroids, or small artwork to the string. Alternate sizes and orientations for a dynamic layout.
- Add decorative elements like tassels or beads between clips to elevate visual interest.
Pro Tips for a Seamless Assembly
- Damage-free installation: Use removable hooks instead of nails or thumbtacks to protect your walls.
- Layered effect: Create multiple rows of string for a more intricate design.
- Theme it: Group photos by events, colors, or subjects to make a cohesive display.
- Seasonal updates: Switch out photos or decorations seasonally to keep things fresh.
String and Clip Comparison Table
| String Type | Pros | Cons | Best for |
|---|---|---|---|
| Twine | Rustic look, affordable, easy to knot | Frays over time | Boho or casual spaces |
| Metallic Wire | Sleek, modern aesthetic | Harder to knot | Contemporary decor |
| Hemp | Eco-friendly, durable | Rough texture | Natural-themed displays |
FAQs About DIY Photo Walls
Q: How can I prevent wall damage?
A: Use adhesive hooks or removable strips instead of nails or thumbtacks. They’re strong enough for light decor and leave no residue when removed.
What Else Would You Like to Know?
Choose below:
Q: What can I display besides photos?
A: Mix in postcards, handwritten notes, art prints, or mementos like tickets or pressed flowers to create more variety in your display.
Q: Can this work in very small spaces?
A: Yes! Opt for a vertical layout or use narrow wall sections. You can also create a compact cluster display above a desk or bed.
Q: How do I store everything when it’s time to move?
A: Wrap the string around a piece of cardboard and store clips in a ziplock bag. This keeps everything organized and ready for your next space.
Q: Does it look outdated?
A: Not at all. In 2025, DIY decor remains trendy. Add modern accents like neutral tones, ceramic beads, or natural fibers for an updated look.
This easy project brings character and warmth to any rental or dorm room. With a little creativity, you can keep these displays fresh and reflective of your personal style. Why stick to plain walls when you can create a gallery filled with your favorite moments?
Transform your dorm room with 3 genius concrete block hacks students love
» See exclusive tips for your home